- Chains[1]
- Oxide[7]
- Pest Control[3]
- Rack Gears[6]
- Other Door & Window Accessories[2]
- Metal Building Materials[4]
- Metal Processing Machinery Parts[1]
- Cast & Forged[4]
- Iron Wire[7]
- Barbed Wire[1]
- Aquaculture Trap[1]
- Other Wire Mesh[1]
- Fencing[3]
- Other Safety Products[1]
- Iron Wire Mesh[3]
- Other Construction & Real Estate[3]
- Gates[4]
- Speed Bump[1]
- Door & Window Rollers[1]
- Nails[7]
- Strapping[7]
- Plywoods[2]
- Other Heat Insulation Materials[5]
- Welding Rods[7]
- Screws[3]
- Building Material Making Machinery Parts[4]
- Safety Gloves[7]
- Other Electronic Accessories[1]
- Steel Wire Mesh[2]
- Corner Guards[1]
- Other Mechanical Parts[1]
- Sheet Metal Fabrication[1]
- Pruning Tools[5]
- Hammer[2]
- Plaster Trowel[5]
- Bicycle Tires[4]
- Honey[2]
- Motorcycle Helmets[1]
- Contact Person : Mr. Fernando Sucre
- Company Name : Heretops Import & Export Co., Ltd.
- Tel : 86-22-27308692
- Fax : 86-22-27306862
- Address : Tianjin,tianjin,B-6B,INNOTEC TOWER BUILDING,239# NANJING ROAD,HEPIN DISTRICT,TIANJIN
- Country/Region : China
- Zip : 300102
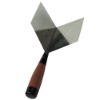
Notched Trowel
Notched Trowel
1) Determine what size notched trowel you need. This is determined by the size of the tile, the surface to be tiled and the type of tile adhesive that you're using. The depth of the notched trowel should be two-thirds the thickness of the tile you are setting, i.e) if you're using a 10mm Notch Trowel the tile would be around 13/14mm in thickness.2) Apply the tile adhesive to the substrate in a small area. Scoop out some tile adhesive from the adhesive bucket using the short end side of the notched trowel. Apply it onto the substrate.Then using the long, flat side of the notched trowel, smooth it out.3) Use the short notched side of the trowel to apply additional tile adhesive. Comb the substrate area until the notches are full to determine that you have applied the correct depth of tile adhesive to the area. 4) Using a twisting action apply the tile to the tile adhesive.
Notched Trowel


